
How To Keep Your Personal Branding Photos Organized
Once you have a really clear vision of who you are and what your brand is all about, you may choose to do a photoshoot to capture that unique vibe and help you create a seamless (and consistent) experience for your people (aka your ideal audience and clients).
In case you’re a bit confused as to your brand values, your brand personality, what you really want to communicate to your audience and what you want to help your clients with, I recommend you check out these posts:
07 | How to prepare for your personal branding photoshoot - a deep dive into your brand
Now that we’ve got that out of the way, let’s dive right in. So you’ve just received back your personal branding photos, and you love them, but you’re also kinda overwhelmed? I got you!

Why you want to label your photos / be organized
The entire point of having a bunch of photos is to save time. But you’re not gonna save time if you feel overwhelmed and procrastinate whenever it comes to actually use your photos and planning out your content.
After your photoshoot, you will likely have a tonne of photos that you can start posting.
Organizing your photos helps you keep the upper hand and make it much easier to plan content.
How to organize your photos
Let's get into the step-by-step process to get your photos organized to make sure you can stay consistent and easily take action.
Step by step
1 | Download them into one folder
Once you receive your photos from your photographer, download them all into one folder. This is going to be the base we’re working from.
2 | Create categories that make sense for you
Now you want to create categories that make sense for your business period so depending on what you do this could be very different. but here’s an example: you could have three categories. The first one is portraits, then lifestyle shots, and finally close-ups (where people can't see your face but they are photos that give a little bit more context to your brand).
In the next section you’ll find a different example of categories. This is especially useful if you like having a balanced, aesthetically pleasing Instagram feed.
3 | Create labels (on Mac OS) for the four categories above
Next, create tags for your categories. On Mac, tags are the colours that show up when you right-click on a file. You can create a new tag by right-clicking on a file, clicking “Tags”, and then typing in a category (“Portraits” for example).
Repeat this process until you’ve created each of the tags for the categories you chose.
An alternative to this is to create a new folder for each category and then dragging your photos the corresponding folder.
The downside to using folders is that you have to put one photo into one folder. Whereas with tags, you can have multiple categories per photo. So for example, you might have a photo tagged “Portrait” but you also want to tag it “Lifestyle”.
4 | Go through all your photos and label them
Once you’ve successfully created your categories, go through all of your photos and tag them with the corresponding tag(s).Like I said before the advantage of using tags is that you can tag one photo with multiple categories.
To add a tag to your photo, right-click on your photo, and then choose the tag you created in the previous category. If you don’t see your tag, click on “Tags” and then all of your created tags should appear.
5 | When you need a certain photo, go to that label and choose
And now when you need a photo that fits certain criteria, you can simply go into your Finder (on Mac) and click on the corresponding tag on the left side (in your Finder Menu).
Bonus Tip: The key to having a nice Instagram feed
now if you ever wondered how people achieve a balanced-looking Instagram feed ( even though in recent years that has been less of a trend with a bigger focus on a more natural less than through looking feed) but here is the key.
Having nice feed on instagram requires balance between shots. No more than two of the following in any 3 rows
Wide
Full body close
Half body / portrait
Two bodies
Text
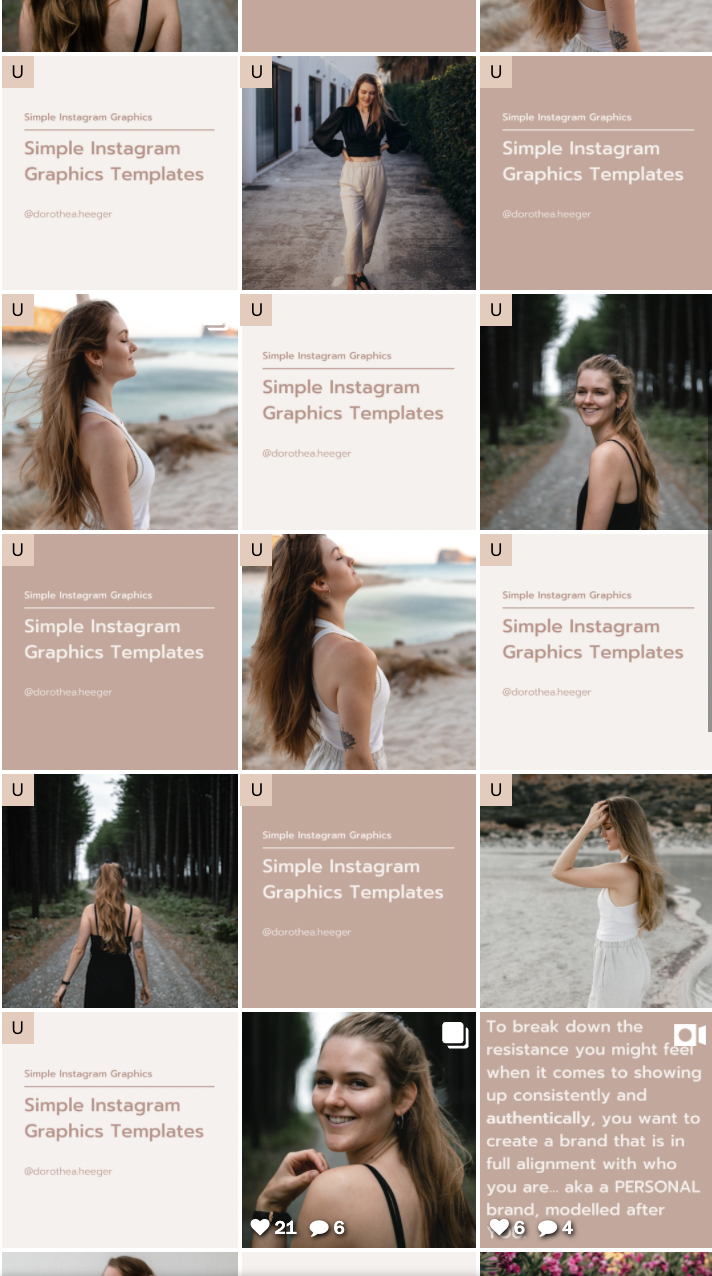
No I have personally found that as a photographer I do want to to have nice looking photos, but I also want to to educate and entertain my audience and I have found that that is best done through graphics.
I have created my own Instagram feed template that you can see below. It's a bit of a more complicated version of a chessboard feed with certain elements being darker and others being lighter and that being a grid.

And you’re done!
Being organized is key to getting things done faster and more efficiently. Whether you have a side-hustle or are working on your business full-time, you need to be efficient to have success.
Being this organized also makes delegating tasks easier. If someone is creating your content/graphics, you can tell them exactly where to find the photos they need, and it makes them more efficient (which ultimately saves you a load of money!!)
Hopefully, this post was helpful to give you a little bit of insight into how to be more organized so that you can be more consistent on social media and efficient in your online business. If you want more tips, come join my community on Instagram where I share daily insides in daily tips on growing your Personal Brand and representing that brand through photos.